


Here's a concise guide that will help you craft the perfect homemade wedding cake of your dreams
Here's a concise guide that will help you craft the perfect homemade wedding cake of your dreams
As you prepare for your big day, you may find yourself tempted by visions of towering, decadent cakes – the kind that grace the pages of bridal magazines and seems fit for royalty. But before running off to the nearest bakery with your credit card in hand, consider this: with a little planning, patience, and some basic baking skills, you can create a stunning, one-of-a-kind wedding cake right in your kitchen. Take it from this intrepid baker—when made with love, a homemade confection can be just as special (if not more so!) than even the priciest professional creation.
Follow the simple steps below to learn how to make a dazzling three-tier cake that looks elegant, tastes delectable, and won’t break the bank:
Select the flavors
When envisioning your homemade wedding cake, it helps to start from the inside out. Begin by tasting and selecting flavors that appeal to both your and your fiance’s palates. Classic combinations like vanilla, chocolate, and strawberry or lemon curd never disappoint. Feeling adventurous? Consider a decadent salted caramel filling or mix things up with alternating layers of two or more flavors. Just be sure to choose varieties that complement each other rather than compete. You’ll want guests yearning for more after the first heavenly bite!
Plan the decor

Next, have some fun dreaming up how you’ll adorn your tasty dessert. Will you keep it classic with white buttercream frosting? Or perhaps accent each layer with pale blue, peach, or ivory—soft, romantic hues befitting the big day. If fashioning intricate patterns seems daunting, remember that simple can be stunning; a clean coat of frosting topped with fresh flowers is always elegant. Those craving dazzle can explore fondant, gum paste appliques, or even incorporated LED lights! Just be sure decor decisions align with your baking prowess. An amateur’s reach should not exceed her grasp.
Prep the pans
With planning complete, it’s time to gather ingredients and supplies. Be sure to pick up cardboard cake circles for sturdy, seamless support between tiers. Acquire pans at least two inches taller than your desired layer height to allow for rising. For even baking, choose a minimal design with straight sides and a light color. Before pouring any batter, prepare pans by coating the insides generously with shortening or nonstick spray. Line the bottom with parchment rounds and lightly dust again with flour after—this prevents sticking for hassle-free releases. Voilà! You’re ready for baking magic.
Mix and bake each layer
When mixing cake batters, precise measurements are key, so invest in quality measuring cups and spoons. Cream butter and sugar first until light and fluffy—this aerates the mixture for optimal rise. Gently fold in eggs, avoiding overbeating which can cause density issues. Alternate adding dry ingredients and wet ingredients in batches, beginning and ending with dry. Evenly divide the batter between pans, using a scale for consistency. Bake in the center of the preheated oven, rotating halfway through. Test doneness by inserting a toothpick (it should come out clean!). Allow to cool completely before removing from pans.
Build the Tiers
Once cooled, carefully peel back parchment paper and transfer layers onto cardboard rounds. Brush loose crumbs away before “gluing” tiers together and onto the cake stand with a thin layer of frosting. Place the largest round on the stand first as a base, then the smallest on top—this creates a tapered shape that avoids toppling risk. Refrigerate for 30 minutes for the frosting “glue” to set. Then mask seams by coating the cake sides in a thin “crumb coat” of frosting and chilling again briefly. Finally, liberally apply the remaining frosting in smooth, even layers. An offset spatula makes this easier!
Add the Finishing Touches
Admire your handiwork before accessorizing with blossoms, ribbons, or other embellishments. Play with placements first to visualize the full effect. If incorporating fresh flowers, carefully insert stems directly into the cake or hold them in place with specialized plastic supports. For floral crowns or wreaths, wire and tape blooms to bendable stems. Glitter, pressed edible gold, or chocolate accents also diversify textures and shine. When garnishing tiers, cluster adornments near the bottom and concentrate less as you move upward. Voilà—stand back and bask in the glory of your dreamy, homemade masterpiece!
Slice and Serve
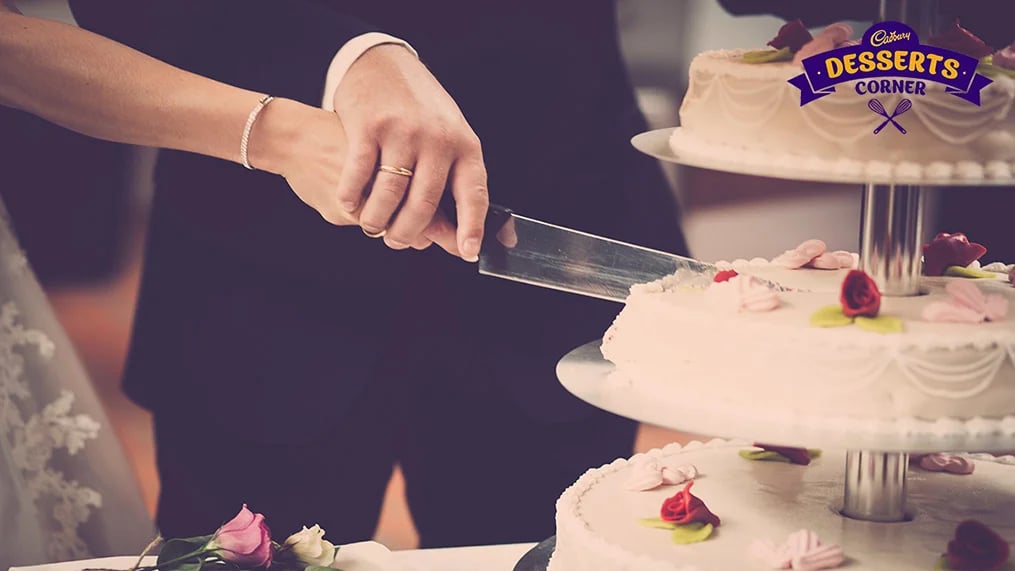
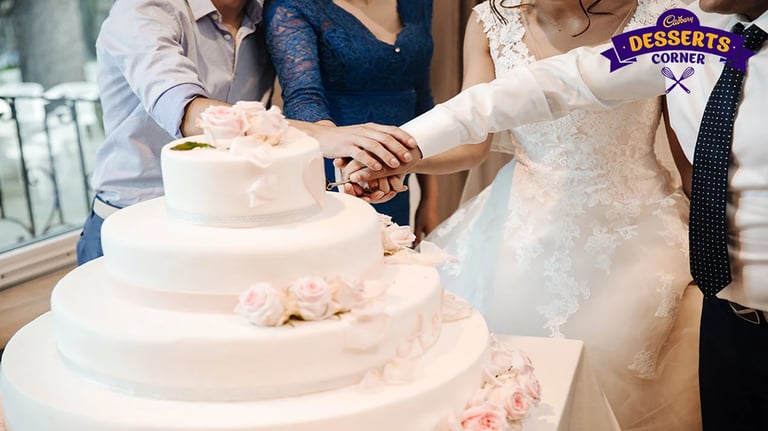
After snapping some photos, it’s time for the best part—slicing into your delectable creation! Use a sharp, non-serrated knife for neat cuts and wipe the blade clean between each one. You may opt to pre-portion slices onto serving plates in the kitchen for efficiency. Garnish plates with extra decor items like flower petals, chocolate shavings, or fruit purées. Finally, deliver the delicious fruits of your labor with pride! Guests will be wowed by your impressive baking skills.
As the toast rings out to your newfound marital bliss, enjoy the metaphoric significance of feeding one another from this made-with-love cake. Each thoughtful bite symbolizes the care and commitment you’ll continue baking into your relationship for all the years to come. So savor every forkful while making a mental note to freeze that top tier—tradition says saving it seals in a year of good luck to sweeten your future together!
Like This Article?
More Like This


Popular Articles


Trending Web Stories


Curated Recipes


