Get the ultimate guide to baking Basque burnt cheesecake, from the perfect texture to achieving that caramelization.

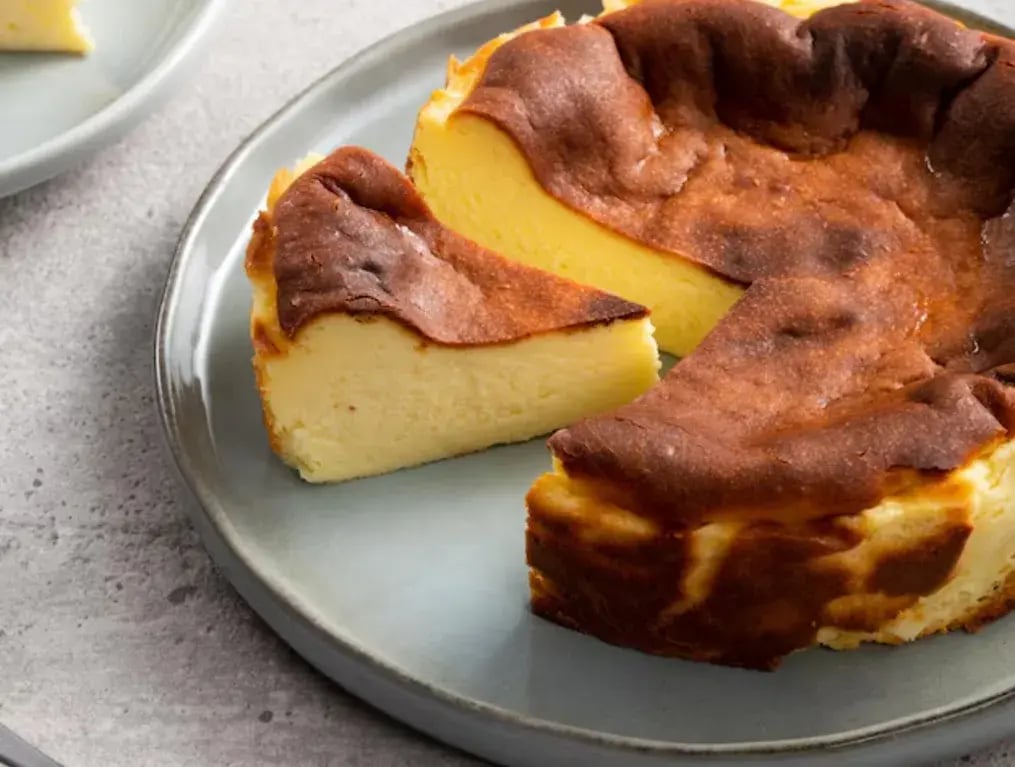
Basque burnt cheesecake has been all the rage for its looks and taste. With its slightly burnt, caramelised top and creamy, melt in your mouth centre this cheesecake stands out in the dessert world. Unlike traditional cheesecakes that are baked at lower temperatures for a uniform colour, Basque burnt cheesecake is baked at high heat to get that signature dark top. But what really sets it apart is the combination of rich and creamy textures and a hint of smokiness from the caramelisation.
The simplicity of the ingredients – cream cheese, eggs, sugar and a touch of flour – and the straightforward method makes it a perfect dessert for both beginners and experienced bakers. As you make this delicious treat, you’ll be amazed at how easy it is to make a show stopping dessert that will impress.
So, get into the recipe and see how you can make this beautiful cheesecake!
How To Make A Basque Burnt Cheesecake For The Perfect Caramelized Delight

Basque burnt cheesecake is a decadent dessert with a caramelised top and creamy, velvety centre. From Spain’s Basque region this cheesecake goes against the grain of traditional cheesecakes by having a dark, burnt top which adds to the flavor.
Ingredients:
- 500g cream cheese (softened)
- 200g sugar
- 2 large eggs
- 200ml fresh cream
- 1 tbsp all-purpose flour
- 1 tsp vanilla extract
- Pinch of salt
Method:
- Preheat the oven to 220°C (430°F). Line an 8 inch round cake tin with parchment paper, making sure the paper goes above the rim (for that rustic look).
- Beat softened cream cheese with sugar until smooth. Add cream, vanilla extract and salt and whisk until combined.
- Sift flour and fold in. Pour into prepared tin and smooth top.
- Bake for 50-60 minutes or until top is dark golden brown and centre is slightly wobbly.
- Let cool completely then refrigerate for at least 4 hours or overnight.
- Serve chilled and enjoy the creamy texture and burnt top!
6 Tips To Perfectly Caramelized Delight Basque Burnt Cheesecake
Choose The Right Cream Cheese For Creaminess

For a smooth, creamy texture in your Basque burnt cheesecake, use good quality cream cheese. Make sure the cream cheese is soft so it’s at room temperature before mixing. This will ensure the batter is smooth and lump free and will give you that silky, creamy filling. Don’t use low fat cream cheese, it won’t give you the same indulgent texture this dessert requires.
Do Not Skip The High Temperature
The caramelised top of the Basque burnt cheesecake comes from baking at a high temperature, usually around 220°C (430°F). The high heat burns and caramelises the top of the cake and gives a slightly bitter contrast to the sweetness of the cheesecake. This high heat also sets the edges of the cheesecake while leaving the centre slightly jiggly, like a custard.
Use Parchment Paper For A Rustic Look
Another important part of making Basque burnt cheesecake is the shape and texture. When lining your cake tin, let the parchment paper hang over the edges, about 2-3 inches above the rim. This will allow the cheesecake to rise above the tin as it bakes and give you that uneven, rustic look that’s part of the charm.
Do Not Overmix The Batter
When you add the eggs, don’t overmix. Overmixing can create air bubbles which will affect the final texture of the cheesecake. You want to mix until everything is combined but not too much air. This will give you a denser, creamier texture that can hold the burnt top, and the contrast between the crispy outside and the silky inside.
Let It Cool And Set Before Serving
Patience is key with a Basque burnt cheesecake. After baking, let it cool in the tin for at least 15 minutes, then refrigerate. It needs to chill for at least 4 hours but overnight is even better. This resting time allows the cheesecake to set and the flavors to meld, so you get that indulgent texture and richness everyone loves.
Add A Pinch Of Vanilla For Extra Flavor

While the Basque burnt cheesecake has a pretty simple flavor profile, a small amount of vanilla extract can take it up a notch. The vanilla balances the cream cheese and adds a hint of depth to the flavor. A teaspoon is enough to boost the flavor without overpowering the other ingredients. You can also try lemon zest or cinnamon for a different flavor.
More Like This
Popular Articles


Trending Web Stories


Curated Recipes