Learn how to make a fluffy Japanese cheesecake at home with these easy-to-follow recipe, creating a soft, airy delight.

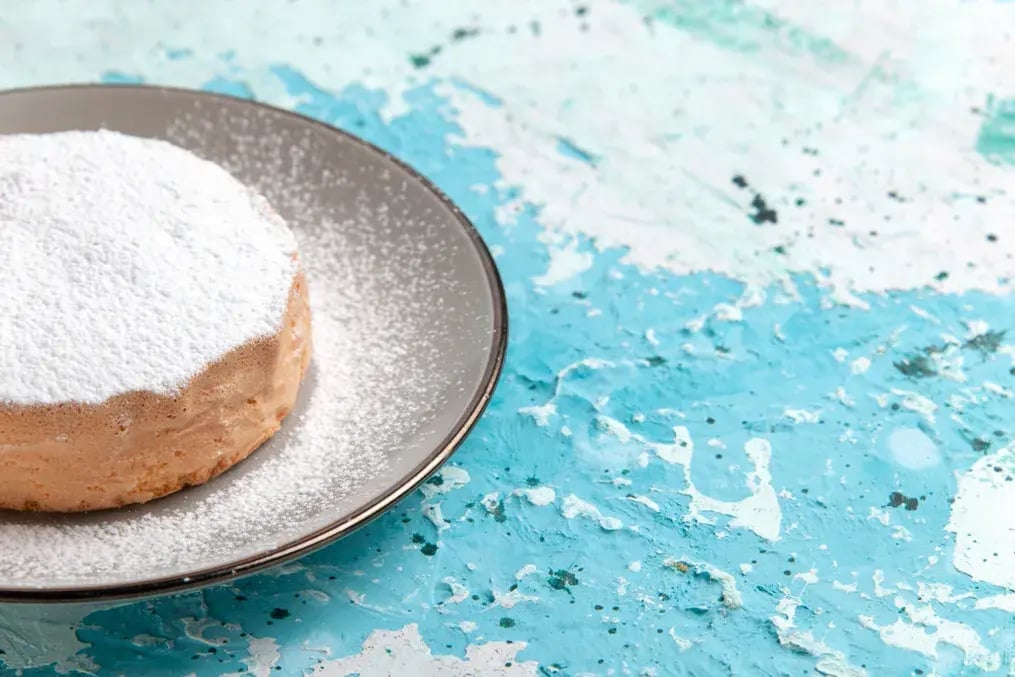
One just can't seem to resist wanting something light, airy, and creamy desserts. It drives them into cheesecakes for sure, but if it happens that they require a lighter one and a load of fluff, then it's simply the Japanese cheesecake. With its melt-in-the-mouth feel, the soufflé in this traditional cheesecake really made a match from heaven. Unlike its Western cousins, which feel heavy, Japanese cheesecake are light and have a very subtle sweetness to them, while the crumb is delicate.
Making a Japanese cheesecake at home would seem intimidating without the proper techniques, but indeed, it can be very simple. The reason is the folding of egg whites to a soft peak consistency while incorporating them carefully into the rest of the mixture. It makes for an amazing dessert if one is looking to have a much lighter, fluffier variant of the normal cheesecake. Are you ready to make it? Well, let us go over this foolproof recipe and make a beautiful cloud in our kitchen.
Japanese Fluffy Cheesecake Recipe to Try at Home

Ingredients:
- 200g softened cream cheese
- 50g unsalted butter
- 60ml milk
- 1 teaspoon vanilla extract
- 5 large eggs, separated
- 100g granulated sugar
- 1 tablespoon lemon juice
- 60g all-purpose flour
- 20g cornstarch
- ¼ teaspoon cream of tartar for egg whites
Method:
Begin by preheating your oven to 160°C. Grease and line the bottom and sides of a 20cm (8-inch) round cake pan with parchment paper. Take care that the paper extends a little way over the rim. Set it aside.
Mix cream cheese, butter, and milk in a heatproof bowl. Gently warm it with the double boiler method until all are smooth, combined, and silky. From the point it's smooth, take it out of the stove, and combine it with the vanilla extract and lemon juice; allow this mixture to cool to room temperature.
Allow the cream cheese mixture to cool while sifting together flour and cornstarch in another bowl, so lumps break apart. Then add dry mixture slowly to the cooled cream cheese mixture. Mix lightly until fully incorporated.
Finally, beat the egg yolks gently in a third bowl. Then gradually add these into the cream cheese mixture slowly, beating in between. Take it out of the mixing bowl.
In a separate bowl, beat egg whites with a little cream of tartar, soft peaks from which will soon appear. With sugar added by spoonful of one tablespoonful at a time, continue until stiff peaks result. This is most important for fluffy cheesecake results.
Fold the beaten egg whites gently into the cream cheese batter in three parts. Use a spatula to fold the egg whites gently without deflating the batter. There should be no streaks of egg whites left in the batter. The batter will be light and airy.
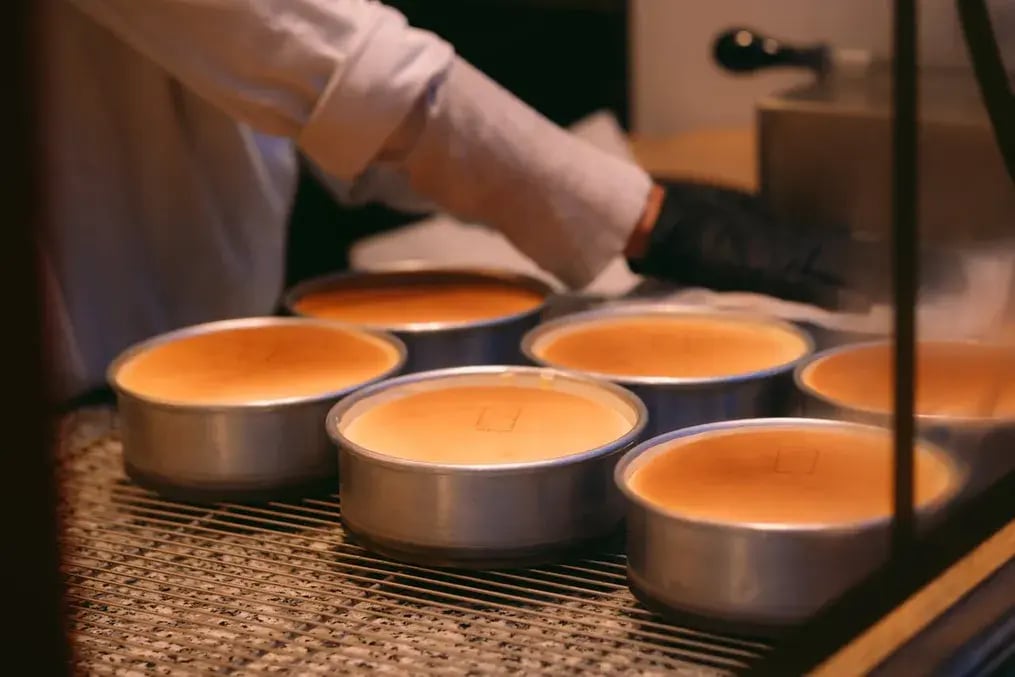
Pour the batter into the prepared cake pan and smooth out the top. Tap the pan gently on the counter to expel any air bubbles that are trapped in the batter. Place a larger roasting pan over the cheesecake pan, with hot water filled in it to create a water bath. The water bath makes the cheesecake bake slowly without cracking.
Bake the cheesecake for 45-50 minutes, or until the top is lightly golden brown and the center is just set but still jiggly. Turn off the oven and let the cheesecake sit in the oven for 1 hour with the oven door slightly ajar. This allows the cheesecake to cool slowly, helping to preserve its airy texture.
Allow it to cool completely, then refrigerate for at least 4 hours or overnight. When ready to serve, run a knife around the edges of the pan to loosen the cake and carefully remove the cheesecake from the pan. Slice and enjoy!
Equipment Needed
Cake pan: Ideally, a round cake pan should be 20cm (8-inch) wide. It is supposed to have high sides because the cheesecake will rise and fill it up when it is put in the oven.
Double boiler or heat-proof bowl: As the cream cheese and butter are too sensitive to burn, you use a double boiler or a heat-proof bowl for gentle melting in simmering water.
Electric mixer or whisk: An electric mixer is best for beating the egg whites to stiff peaks. If you don't have an electric mixer, you can use a hand whisk.
Spatula: A rubber or silicone spatula is used to fold the egg whites into the batter without deflating the mixture.
Roasting pan: This is used for the water bath to ensure even, gentle baking. Make sure it's large enough to accommodate your cheesecake pan.
Storage Tips
Refrigeration: Since the Japanese cheesecake is a delicate dessert, it should be stored in the refrigerator. Cover it with plastic wrap or place it in an airtight container to prevent it from absorbing any odors from the fridge.
Keep it fresh: Cheesecake will remain fresh in the fridge for 2-3 days. It will be slightly less fluffy the longer you wait, so enjoy it best within the first 48 hours.
More Like This
Popular Articles


Trending Web Stories


Curated Recipes